Ed, from THW sent me some minis to paint up for him...as he is wont to do at times. This time around some of the figs in the batch he wanted painted were some Woodland Creatures from Mega Minis. There were a Beaver, a Mountain Lion, a Badger, a Stag, and a Bear.
These figs are your typical mega Mini figs. They area great compromise between quality and price. There are gems through out the mega Minis lines. In this one, it is the Stag, IMO. That is a nice figure as far as I am concerned.
Monday, March 26, 2012
Friday, March 23, 2012
2012 Fifty Cent Miniature Challenge, Pt 2
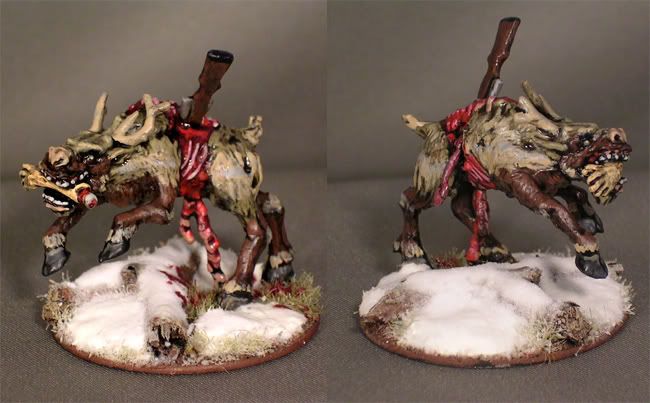
I forgot to post this earlier, I finally sold the first item in my 2012 FCM Challenge. If you remember, it was the Zombie Reindeer.
It sold as part of a larger group of minis and ended up going for $5.07, once paypal fees, shipping, and price per fig are averaged. Once, the original purchase price is figured in the profit off the sale is $4.57.
Off to a slow start. There is a local convention that is coming up, and I am eyeing some cheap toys to do some conversion on. Hopefully, within the next couple of weeks I'll be able to do some wheeling and dealing to increase the amount in the profit column.
Days Remaining: 283
Balance: $4.57
Monday, March 19, 2012
And Now For Something Completly...Orky
I felt the need to do something different, so I dug up this old Gorka Morka Ork and painted it. I tried to up the quality of the paint job. Even though I am pleased with the end results, I am not 100% satisfied with them. The skin tone could have been better and the eyes are kind of "meh".
Even though I'd be considered a heretic by many GW fan-boys for various reasons, I still appreciate the quality of most of the GW minis. This post proves that I am not 100% adverse to putting paint to brush on a GW fig. Heck, I'd even field some on a table top; not using GW rules of course :-P
Even though I'd be considered a heretic by many GW fan-boys for various reasons, I still appreciate the quality of most of the GW minis. This post proves that I am not 100% adverse to putting paint to brush on a GW fig. Heck, I'd even field some on a table top; not using GW rules of course :-P
Monday, March 12, 2012
Casting My First Terrain Pieces
 For my birthday last year, my kids bought me an Alumilite Casting Kit; the really nice one. I had mentioned that I wanted to give it a try; I admit I was left scratching my head on exactly what to do with it, though. I did want to have a try at casting; I just didn't have anything in mind to cast at the moment. That was 7 months ago. Until a couple of days ago, it sat on my shelf unused.
I was mulling over filler piece ideas for my TEOTWAWKI project. One of the ideas I came up with was dragon's teeth, you know those big concrete anti-vehicle things. Nothing says war zone more than they do, right? So I set out and made a piece with three of them on it. As I was sitting there looking at it, contemplating how to paint it, I was struck with the idea that it made a perfect piece for me to try and cast, so I broke out the kit.
(This next part is going to be old hat for those who have done casting, before. My hopes are that any novices will see how easy it is and give it a try. Plus I like hearing myself talk...or type as the case may be.)
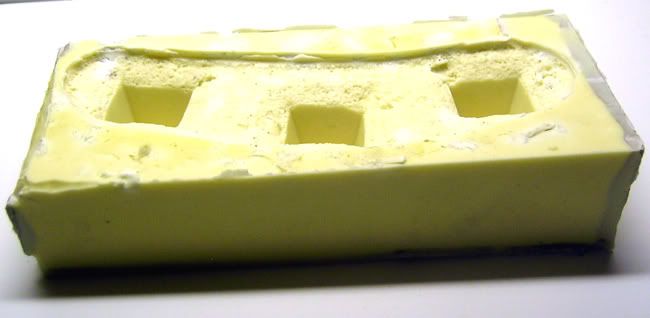 The first thing I did was make a mold. I ended up using all the RTV Rubber supplied in the kit to make the mold. RTV is short for "Room Temperature Vulcanizing"; meaning that the rubber cures at room temp; no special curing processes needed. To actually, make the mold, I made on open top box big enough to hold what was now my master. I sealed the master with clear varnish, and affixed it to the bottom of the box. I then mixed the RTVR per the instructions, and poured. I removed air bubbles that had formed when mixing the rubber, by placing the now filled mold on my table, then taking my jig saw, turning it on and holding it against the bottom of the table. The vibrations caused the bubbles to float to the surface. It would probably be easy to make a vibrating table with an old palm sander.
I was able to remove the box after about 4 hours. I let the mold cure over night. The discoloration in the pic are due to two things. The grey is the clay I used to seal the inside of the box and the white is due to not mixing the RTVR thoroughly. Neither one of which caused an issue. Next time I make a mold, I am going to use something like pink foam to act as a filler, so I don't use as much RTVR.
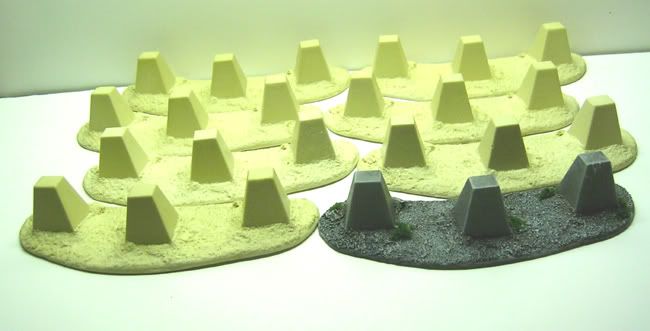
The following morning I set about making some casts. Following the directions I mixed the 2 part resin. I ended up wasting about 1/2 of what came in the kit, trying to figure out how much to use in the mold. I mixed WAY too much on the first couple of attempts. It took a lot less than I anticipated. One thing about the resin, once you start mixing, there is no going back. It starts setting in about a minute. It is a big time saver, as I was able to turn out a workable cast in about 15 minutes; that from mixing to final sanding. In the end, I was able to get 7 casts in less than 2 hours time. That is a lot less than it would have taken making them by hand. Plus, they are a lot more durable than the original master. The picture to the left shows the casts, along with the painted up master.
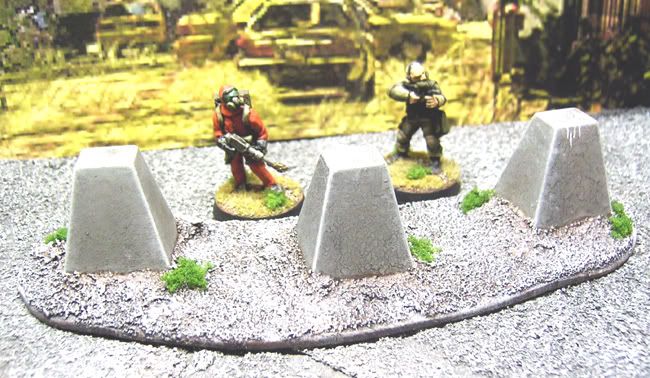
Below, you can see more detail on the finished master, with a couple of 25mm minis for scale. I am going to put a couple of the casts under the knife and add some battle damage to them. These will definitely work on my PA table. If I did 28mm WWII, they'd work perfectly there, too.
In the end, I learned a lot and had an enjoyable time to boot. I think I may remaster this piece; changing dimensions ans adding a bit of detail. Also, I have to work out the fiscal aspect of casting more, and different items. The RTVR and resin can be a bit pricey. If the costs work out right, hopefully I can finance casting stuff for my own table by selling stuff to others for theirs, if not put a little extra change in my pocket.
Thursday, March 8, 2012
TEOTWAWKI: Wrecks
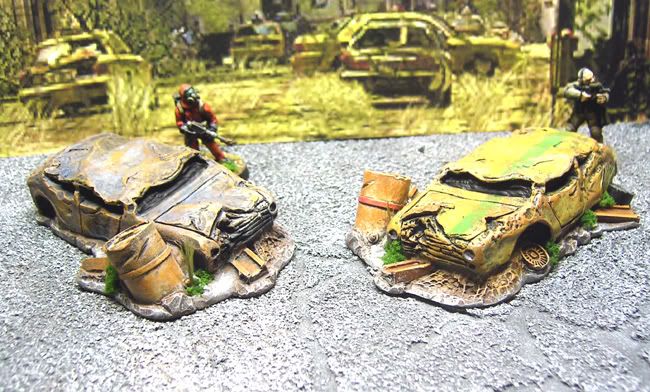
I purchased a couple of sports car wrecks from Firedragon Games, recently. I threw some paint on them last night. I finished them up by adding some coarse turf and some weeds to make them look suitably ruined and abandoned. They'll make great filler for my PA table that is taking shape. Here's a pic of them, with a couple of 25mm figs for scale.
They are a little small; they are sports cars, though. The angle of the pic makes them look smaller than they are, for some reason. They do fit well with my 1/43rd scale vehicles. They are appropriately wrecked, too. Aside from washing them, I didn't have to do any prep work on them, as the casts were very clean. They cost me about $8.00 each, which isn't too terribly bad. All in all, they were a good purchase.
On a side note, the shopping cart at the Firedragon site didn't discount the VAT as it should have. Paul from FD Games sent me an email telling me about it. He threw in a sandbagged position with my order to make up for he extra charge. I wouldn't have know the difference; yet he did so, anyway. That's the type of business ethics that makes companies worth dealing with, so consider FD Games highly endorsed by me.
Monday, March 5, 2012
Black Delilah
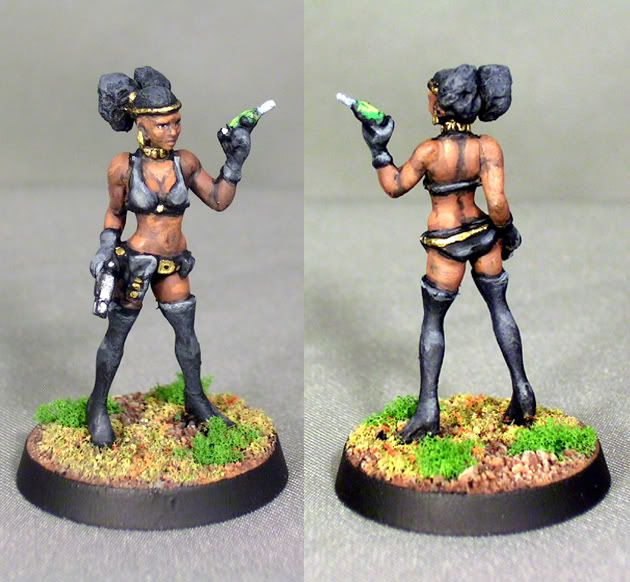
Here's another clicky repurposed of a HeroClix fig. She makes for a nice femme fatale or assassin. I am not really sure what she's holding in her left hand, so I painted it up like a syringe full of glowing green...stuff.
I took these first pics and noticed some problems with the flesh tones. I have since corrected them by smoothing the colors out. Here is a quick and dirty picture of the changes.
I took these first pics and noticed some problems with the flesh tones. I have since corrected them by smoothing the colors out. Here is a quick and dirty picture of the changes.
Thursday, March 1, 2012
On The Workbench 03/12
Another month has gone by, and it's time for another accounting of
what I've been up to. Here's this month's "On the Workbench" post.
The new items and projects that I added stuff to are denoted by an * next to them.
On the Workbench for March 2012:
(This is all stuff that is partially finished; in no particular order)
12 Acheson ATZ Minis* - More minis for paint and review.
6'x4' Zuzzy Mat* - Gaming Mat for my TEOTWAWKI project.
15 28mm PA Survivors - 3, 5 man packs from Lead Adventure Miniatures
18 Heroclix Figs - Figures for conversion into sci-fi and horror gaming minis
16 x Pulp/Steampunk Minis - 5 more figs added for the commission painting of some Fiendish Fabrications figures
20 Mantic Ghouls - Mantic Ghoul Regiment
6 28mm Survivors - Obelisck Nighthawk gang
28mm Post Apoc Ruins Project - Ruins made from Gamecraft's Foamcore 6 story building. This one is half done.
10mm Ruins Project - Foamcore ruins for a BTech style game using Mechwarrior figs; another half finished project.
28mm Vehicles* - 6-8 vehicles for my survivor
15mm Suburbia - Paper/foamcore houses for suburban Lazarus.
50 20mm WWII Russians - Minis for a semi defunct NUTS! East Front project I planned
2 T-34/85s - Same As Above
Various Fantasy/Sci Fi minis - I have a box of old minis I use to try out techniques and hone my skills. I have quite a few half painted figs that I'd like to finish
February's Finished Projects/Minis
(I will be posting these up through out the month, as I get photos and such)
8 x Heroclix Conversions - about 1/2 have been posted on WTL and ZSS, the rest are pending.
2 x HotWheels Planes - Conversions for 15mm post apocalyptic style games
1 x Post Apoc Ruin -
1 x GW Ork - Just a one off mini for giggles.
5 x 28mm Vampires - Finally got these done.
21 x Rebel Mini Urban Rioters - For my ATZ Campaign.
 | |
On the Workbench for March 2012:
(This is all stuff that is partially finished; in no particular order)
12 Acheson ATZ Minis* - More minis for paint and review.
6'x4' Zuzzy Mat* - Gaming Mat for my TEOTWAWKI project.
15 28mm PA Survivors - 3, 5 man packs from Lead Adventure Miniatures
18 Heroclix Figs - Figures for conversion into sci-fi and horror gaming minis
16 x Pulp/Steampunk Minis - 5 more figs added for the commission painting of some Fiendish Fabrications figures
20 Mantic Ghouls - Mantic Ghoul Regiment
6 28mm Survivors - Obelisck Nighthawk gang
28mm Post Apoc Ruins Project - Ruins made from Gamecraft's Foamcore 6 story building. This one is half done.
10mm Ruins Project - Foamcore ruins for a BTech style game using Mechwarrior figs; another half finished project.
28mm Vehicles* - 6-8 vehicles for my survivor
15mm Suburbia - Paper/foamcore houses for suburban Lazarus.
50 20mm WWII Russians - Minis for a semi defunct NUTS! East Front project I planned
2 T-34/85s - Same As Above
Various Fantasy/Sci Fi minis - I have a box of old minis I use to try out techniques and hone my skills. I have quite a few half painted figs that I'd like to finish
February's Finished Projects/Minis
(I will be posting these up through out the month, as I get photos and such)
8 x Heroclix Conversions - about 1/2 have been posted on WTL and ZSS, the rest are pending.
2 x HotWheels Planes - Conversions for 15mm post apocalyptic style games
1 x Post Apoc Ruin -
1 x GW Ork - Just a one off mini for giggles.
5 x 28mm Vampires - Finally got these done.
21 x Rebel Mini Urban Rioters - For my ATZ Campaign.
Subscribe to:
Posts (Atom)


