Showing posts with label Tutorial. Show all posts

Monday, June 4, 2012

Hedges - Quick and Easy Tutorial

Materials
Foam Padding - Electronic Packing material (free)
Woodland Scenics Course Turf (aka Flock) - From local Train Shop ($9.99/32oz Shaker)
Large Freezer Bag - Pilfered from Kitchen (free)
Spray Adhesive - From Hobby Lobby ($3.00)
Spray Matte Finish or Clear Varnish(not pictured) - From Hobby Lobby ($3.00)
Sharp Knife (not pictured)- For cutting foam
Disposable gloves (optional/not pictured) - Pilfered from work

Step 1 - Cutting The Foam
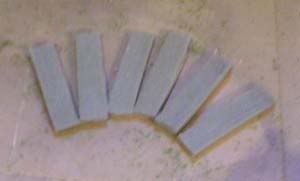
Start by cutting the foam into strips. The strips can be any size you wish. In this example, I am making hedges for use with 28mm figures. The foam strips measures roughly 4.5in x 1.25in x .5in. Cut them slightly smaller than what you want the final hedges to be; I will explain in a bit. Also, they don't need to be exactly the same size. Variation is good.


Step 2 - Texturing The Foam
Take your thumb and forefinger and start tearing chunks of foam off the strips. You'll want to do this along all the edges, and randomly across the flat sides. They should look as below:
 Step 3 - Applying the Flock
Now we need to turn the foam strips into our hedges. Fill the freezer bag about half full with the flock. In this case, I am using a 50/50 mix of Woodland Scenics Light and Medium green. One at a time, liberally apply each foam strip with spray adhesive. I wear the gloves at this point, because it can get rather messy, if you don't. It's up to you, though. Then take the foam a put it in the freezer bag. Give the bag a good shake, so the foam is completely covered with flock. This is where cutting them smaller comes into play. As it sticks to the foam, the flock will make the finished hedges that much larger than the foam. Place the hedges to the side to dry.
Sorry for the blurry pic. It's hard to get good help at 8AM on a Saturday around my house :-)


Step 4 - Finishing The Hedges
After the hedges are sufficiently dry (tacky to the touch is OK), liberally spray them with the Matte Sealer, or what ever you wish to use. I used Krlyon Oder Free/Clear Finish (the small can in the middle) that I had from a previous project. This will act to keep flock from coming off as the hedges are handled.

Basing the Hedges
At this point, the hedges are done, and ready to based as you wish. I usually base my on large craft sticks that have been finished as described in my Basing "how to" here on WTL:
Figure Basing - Basic Technique
The hedges can also be used as part of a larger display, if you wish
Finished Examples
Below, as some close of of some finished hedges (prebased) of different sizes:
w/ 28mm GW Space Marine
w/ 25mm Cowboy and 20mm Liberation Mini
All in all, it took me about 25-30 minutes (including drying times) to make the six hedges in the tutorial. This is a simple project, and is very quick and easy to do.

Monday, May 28, 2012

Diamond Tread Base Tutorial

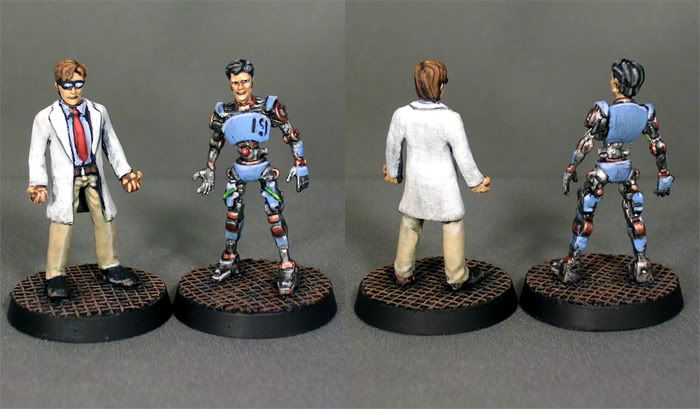
As promised, here's a repost of a tutorial I did about 4 years ago on how to make make Diamond Tread bases, for use with modern and SciFi minis.

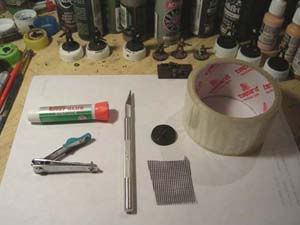
The Materials
You will need:
  • A Base (slotta or not) - I am using a slotta base in this example
  • A square of nylon window screen
  • Super/Krazy Glue
  • Tape - if using a slotta base
  • Hobby Knife
  • Nail Clippers
  • Sand Paper - not pictured

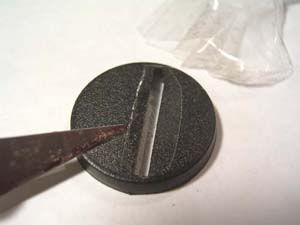
Step 1 - If using a Slotta Base...
you need to cover the slot. Take a piece of tape (I just used some packing tape that was handy) and cover the hole. Next, take your knife and cut off the excess, leaving the hole covered, like so:


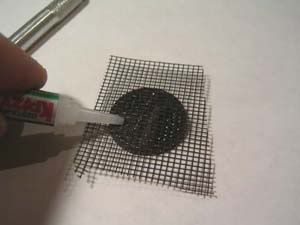
Step 2 - Take the Nylon Window screen...
and lay it across the base. Take the Super/Krazy Glue and apply it liberally to the base. We want to cover the entire base. 
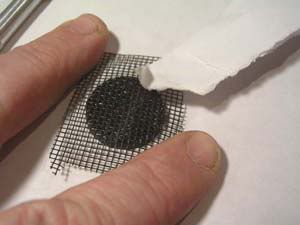
You can use a bit of scrap paper to smear the glue around. This will get glue down into every square of the Nylon Screen. You can see that I use two fingers to hold opposing corners down, while I do this. This will keep the screen from sliding around, or wrinkling during this step. Be sure to let the base completely dry after this step.

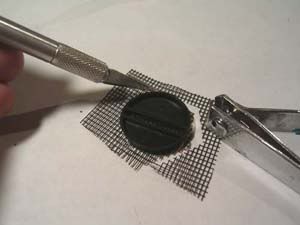
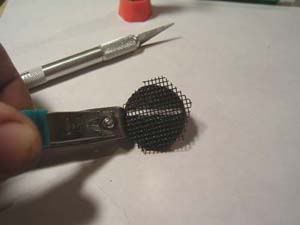
 Step 3 - Trim the excess screen away, by....
Flipping the base over and using your knife to cut away the excess. Try to get as close as possible; although you can leave some excess behind.
 After trimming with the knife, take the nail clippers and finish trimming away the excess. You should make the screen flush with edge of the base. After trimming the excess away, take the sand paper and sand down the edges. Use a downward motion only. Going up and down will cause the screen to fray.

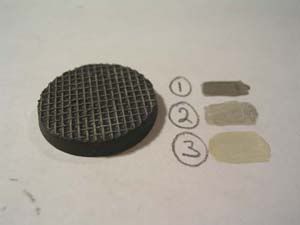
Step 4 - Painting the base...
Is the last step. If you used a slotta base, flip the base upside down and prime it black. This will blank out the clear tape used in step one. Next prime the top with black, and dry-brush. I used a three color scheme that uses 1) Neutral Gray 2) Dove Gray 3) Sand. You can use whatever colors you like. (Note, I've since added Burnt Sienna for a rust effect)


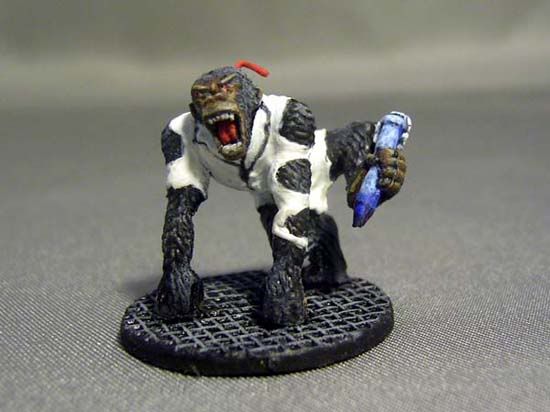
Finished Examples:
Here are several repainted/rebased Clicky mini on home-made Diamond Tread base:

Based on a 1" Fender Washer
Based on 25mm Round Slotta Bases

Tuesday, April 3, 2012

Making a Flying Base

I promised to make a tutorial on how to throw together a flying base over on Welcome To Lazarus, which I posted today.  I've reposted it here, in case you don't follow my other blog.  It's a simple process which can turn out nice looking and very functional accessories for your table

Materials:
You'll need the following:
Fender washer or CD; depending on the scale of your aircraft.  The process is the same, despite the scale.
Wire Hanger, or Bendable Metal Rod
Glue; Both SuperGlu or HotGlue will work
Modeling Clay
Sand
Rocks; optional
Earthtone Paints
Drill with a bit as big as your wire
Side-Snip Wire Cutters

Step 1:
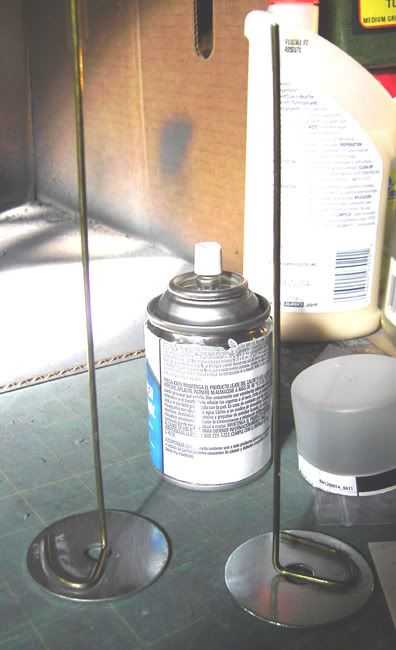
The first thing you do is cut the wire hanger to the length you want. For 15mm, I use about 10-12 inches.   Make a hook in one end of the wire, then make a 90 degree bend in it.  See the photo below to get an idea of what it should look like.

 The Results of Steps 1 and 2

Step 2:
Use your glue to attach the wire to fender washer or CD.  The larger the loop you made, the more contact area you have with the base.  It's a good idea to try to make give the wire as much contact area as possible.

Step 3:
Take your drill and drill a hole in the bottom of your aircraft.  It's a good idea to try and make it close to the center of gravity as possible, as this saves you some hassle making sure the model is stable when on the base, later on.  Test fit the aircraft to the wire.  At this point, I've seen people go all out, making sleeves that the wire fits into, or adding magnets.  That's great, if you want to do the extra work.  At smaller scales, though, it just doesn't seem worth it.

Step 4:
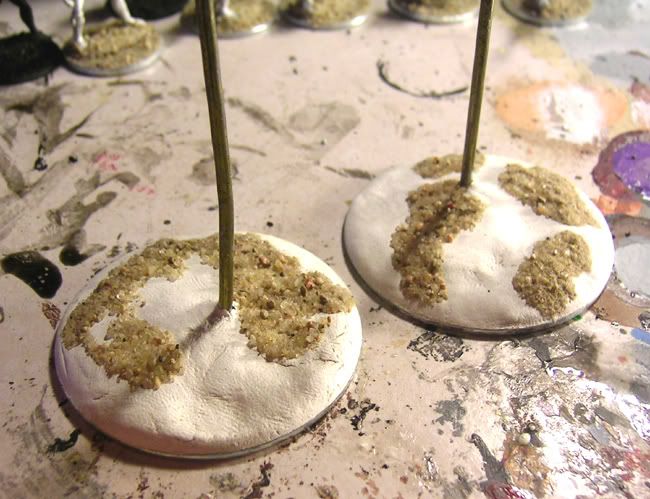
Once the glue has dried, take your modeling clay and build up the base. You can add any details you want. I use small rocks and sand.  I've seen people use a lot of other things, as well.  I even saw one base that had a house on it, with the wire running up through a smoking chimney!  If you need a bit of extra weight, to stabilize the base when the aircraft is attached, this is when you do it.  Use the optional rocks to give the base the needed heft.

 Step 4 Complete

Step 5:
The last step is to paint the base.  I use the same technique I use on my mini bases, only on a larger scale.  In a nutshell, I prime the, black (masking the wire in the process), then use my earth tones to give it color and pick out details.  Finally, I add flock and static grass.  I've seen people add trees and bushes, too.

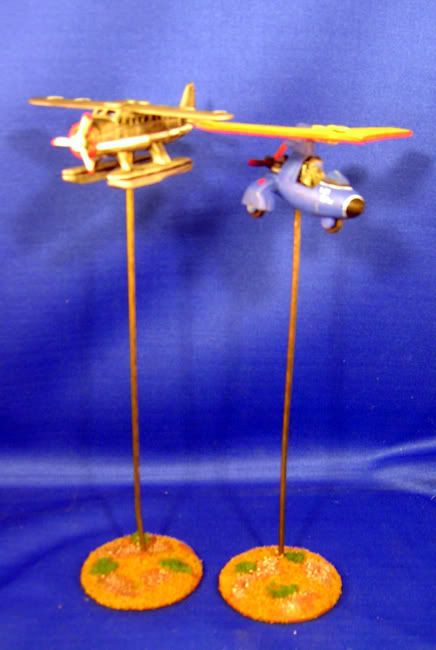
The Finished Product

To use the bases, simply slide the aircraft on and off the wire when needed.  Pretty simple and quick to do.