Showing posts with label WIP. Show all posts

Monday, May 28, 2012

Diamond Tread Base Tutorial

As promised, here's a repost of a tutorial I did about 4 years ago on how to make make Diamond Tread bases, for use with modern and SciFi minis.

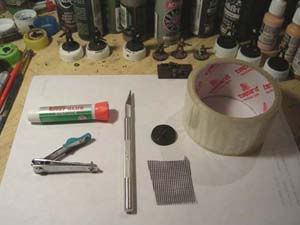
The Materials
You will need:
  • A Base (slotta or not) - I am using a slotta base in this example
  • A square of nylon window screen
  • Super/Krazy Glue
  • Tape - if using a slotta base
  • Hobby Knife
  • Nail Clippers
  • Sand Paper - not pictured

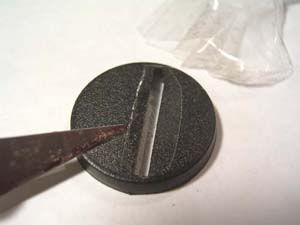
Step 1 - If using a Slotta Base...
you need to cover the slot. Take a piece of tape (I just used some packing tape that was handy) and cover the hole. Next, take your knife and cut off the excess, leaving the hole covered, like so:


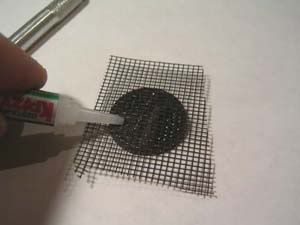
Step 2 - Take the Nylon Window screen...
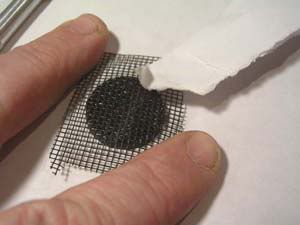
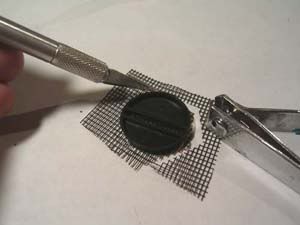
and lay it across the base. Take the Super/Krazy Glue and apply it liberally to the base. We want to cover the entire base. 
You can use a bit of scrap paper to smear the glue around. This will get glue down into every square of the Nylon Screen. You can see that I use two fingers to hold opposing corners down, while I do this. This will keep the screen from sliding around, or wrinkling during this step. Be sure to let the base completely dry after this step.

 Step 3 - Trim the excess screen away, by....
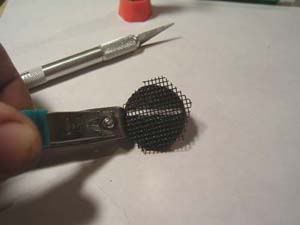
Flipping the base over and using your knife to cut away the excess. Try to get as close as possible; although you can leave some excess behind.
 After trimming with the knife, take the nail clippers and finish trimming away the excess. You should make the screen flush with edge of the base. After trimming the excess away, take the sand paper and sand down the edges. Use a downward motion only. Going up and down will cause the screen to fray.

Step 4 - Painting the base...
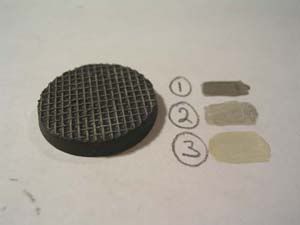
Is the last step. If you used a slotta base, flip the base upside down and prime it black. This will blank out the clear tape used in step one. Next prime the top with black, and dry-brush. I used a three color scheme that uses 1) Neutral Gray 2) Dove Gray 3) Sand. You can use whatever colors you like. (Note, I've since added Burnt Sienna for a rust effect)


Finished Examples:
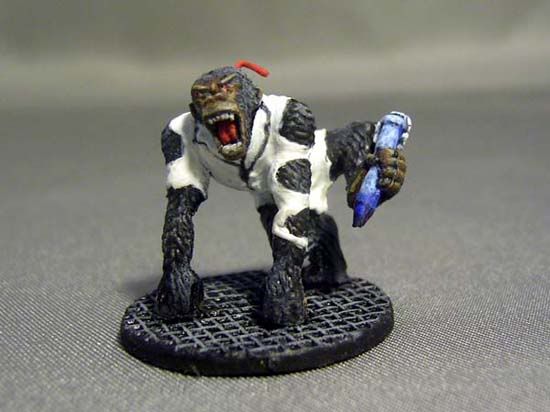
Here are several repainted/rebased Clicky mini on home-made Diamond Tread base:

Based on a 1" Fender Washer
Based on 25mm Round Slotta Bases

Monday, March 12, 2012

Casting My First Terrain Pieces

For my birthday last year, my kids bought me an Alumilite Casting Kit; the really nice one.  I had mentioned that I wanted to give it a try; I admit I was left scratching my head on exactly what to do with it, though.  I did want to have a try at casting; I just didn't have anything in mind to cast at the moment.  That was 7 months ago.  Until a couple of days ago, it sat on my shelf unused.

I was mulling over filler piece ideas for my TEOTWAWKI project.  One of the ideas I came up with was dragon's teeth, you know those big concrete anti-vehicle things.  Nothing says war zone more than they do, right?  So I set out and made a piece with three of them on it.  As I was sitting there looking at it, contemplating how to paint it, I was struck with the idea that it made a perfect piece for me to try and cast, so I broke out the kit.

(This next part is going to be old hat for those who have done casting, before.  My hopes are that any novices will see how easy it is and give it a try.  Plus I like hearing myself talk...or type as the case may be.)

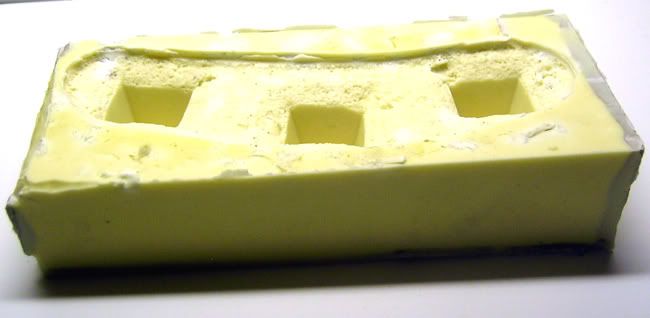
The first thing I did was make a mold.  I ended up using all the RTV Rubber supplied in the kit to make the mold.  RTV is short for "Room Temperature Vulcanizing"; meaning that the rubber cures at room temp; no special curing processes needed. To actually, make the mold, I made on open top box big enough to hold what was now my master.  I sealed the master with clear varnish, and affixed it to the bottom of the box.  I then mixed the RTVR per the instructions, and poured.  I removed air bubbles that had formed when mixing the rubber, by placing the now filled mold on my table, then taking my jig saw, turning it on and holding it against the bottom of the table.  The vibrations caused the bubbles to float to the surface.  It would probably be easy to make a vibrating table with an old palm sander.

I was able to remove the box after about 4 hours.  I let the mold cure over night.  The discoloration in the pic are due to two things.  The grey is the clay I used to seal the inside of the box and the white is due to not mixing the RTVR thoroughly.  Neither one of which caused an issue.  Next time I make a mold, I am going to use something like pink foam to act as a filler, so I don't use as much RTVR.

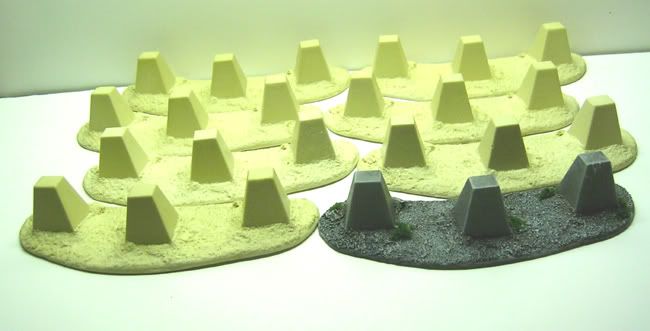
The following morning I set about making some casts.  Following the directions I mixed the 2 part resin.  I ended up wasting about 1/2 of what came in the kit, trying to figure out how much to use in the mold.  I mixed WAY too much on the first couple of attempts.  It took a lot less than I anticipated.  One thing about the resin, once you start mixing, there is no going back.  It starts setting in about a minute.  It is a big time saver, as I was able to turn out a workable cast in about 15 minutes; that from mixing to final sanding.  In the end, I was able to get 7 casts in less than 2 hours time.  That is a lot less than it would have taken making them by hand.  Plus, they are a lot more durable than the original master.  The picture to the left shows the casts, along with the painted up master.

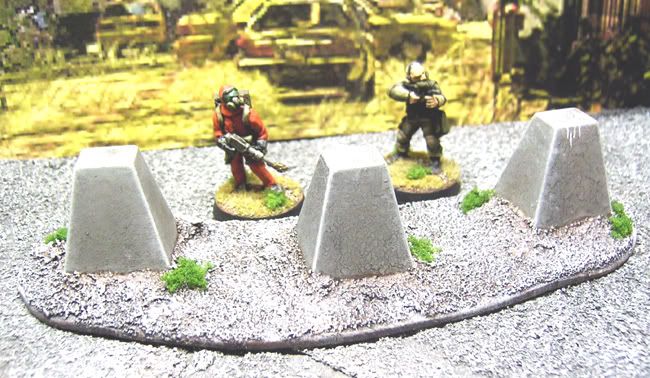
Below, you can see more detail on the finished master, with a couple of 25mm minis for scale.  I am going to put a couple of the casts under the knife and add some battle damage to them.  These will definitely work on my PA table.  If I did 28mm WWII, they'd work perfectly there, too.

In the end, I learned a lot and had an enjoyable time  to boot.  I think I may remaster this piece; changing dimensions ans adding a bit of detail.  Also, I have to work out the fiscal aspect of casting more, and different items.  The RTVR and resin can be a bit pricey.  If the costs work out right, hopefully I can finance casting stuff for my own table by selling stuff to others for theirs, if not put a little extra change in my pocket.

Tuesday, February 28, 2012

I got a Zuzzy, I got a Zuzzy...

Photo From Zuzzy.com
I received my long awaited Zuzzy gaming mat last week.  I ordered a 4'x6'  Wounded City mat and am quite pleased,  The wait was longer than anticipated.  Zuzzy set the expectation of 2-5 weeks.  It actually took about 7 1/2.  In their defense, at exactly 5 weeks I received an email from them saying that the had received a larger than expected amount of orders, and had had some problems with their vinyl vendor.  They apologized, and said that my order would be out shortly, and it was.  Kevin even threw in complimentary 14"x11" swath of mat for free.


Here are my impressions on the products. The mat came in a square cardboard tube, which will come in handy for storage.  The label the package inside came with instructions on the back.  I'll get back to that in a second.  The mat was considerably thinner than I had expected.  Still, it seems pretty durable.  The detail on the mat is exactly as pictured on the Zuzzy site.  I painted the small swath according to the instruction.  First I washed it with a black wash ( 20/1 Future/Black ink).  Next I dry brushed it with white, and dappled it with brown.  Finally, I painted the brick with Burnt Seinna, Cadnium Red, and Pumpkin Orange.  As you can see it turned out nicely.

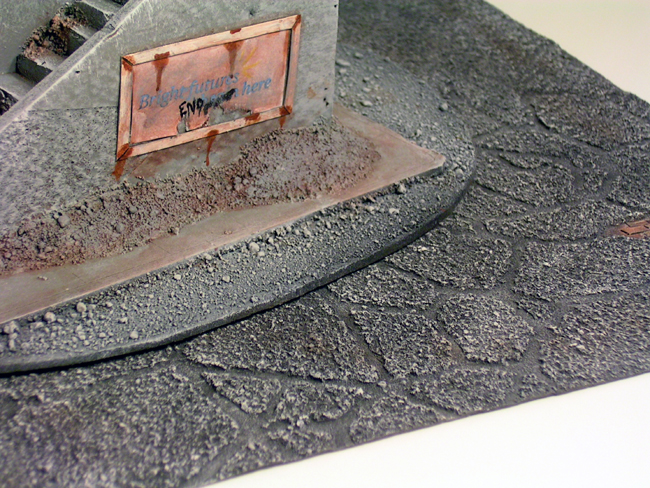
Finally, I wanted to make sure that everything matched I broke out one of my finished TEOTWAWKI pieces and put it on top.  It all matched up well, although I may need to rethink my basing on future pieces.  I can work the cracked look into future ones to make it more seamless.

Thursday, February 9, 2012

TEOTWAWKI - Blasted Ruins WIP, Pt 5

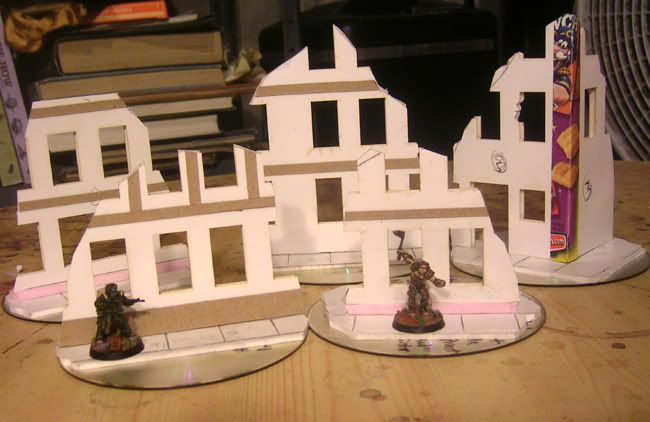
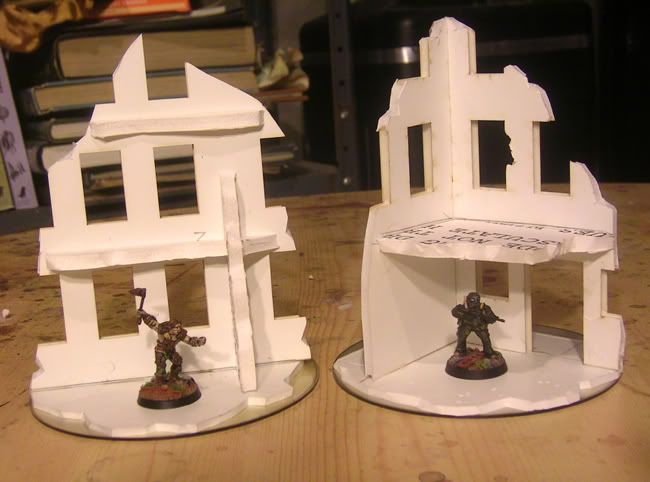
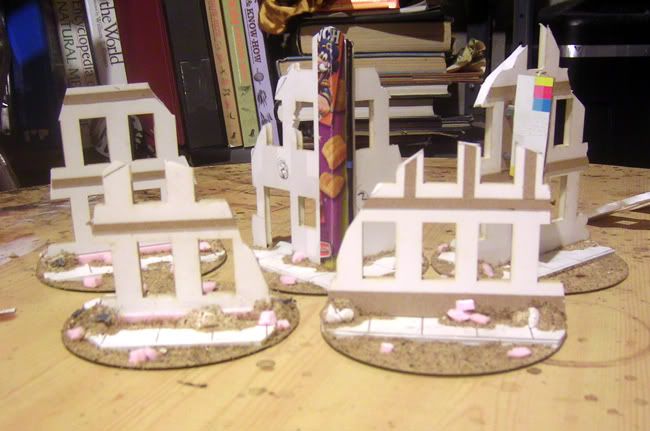
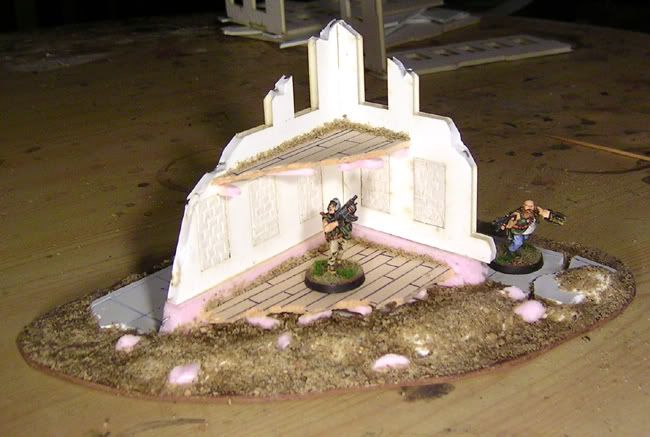
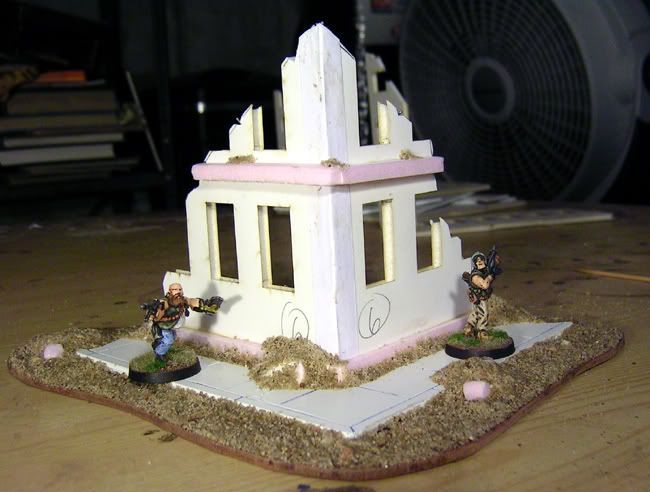
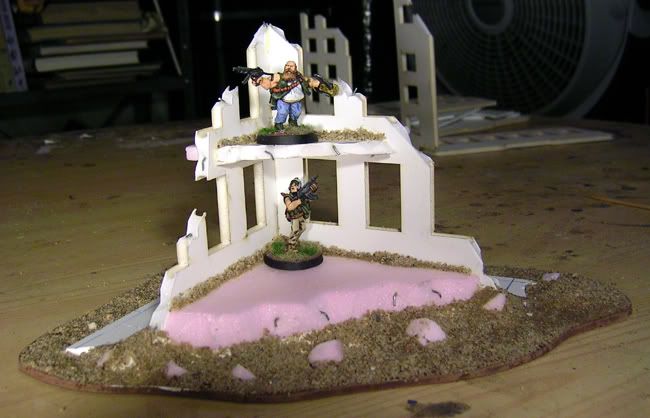
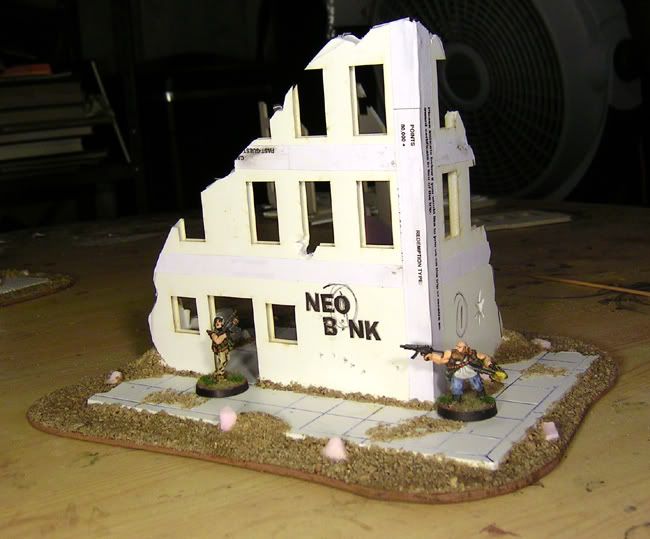
These pieces were actually the first pieces I built and painted.  They were posted over on the Post Apoc Wargames Forum a couple of months ago, and I thought now would be a good time to bring them together with the rest of the ruins.  Keeping with the flow of things, I'll post the WIP photos, then the finished ones next week.

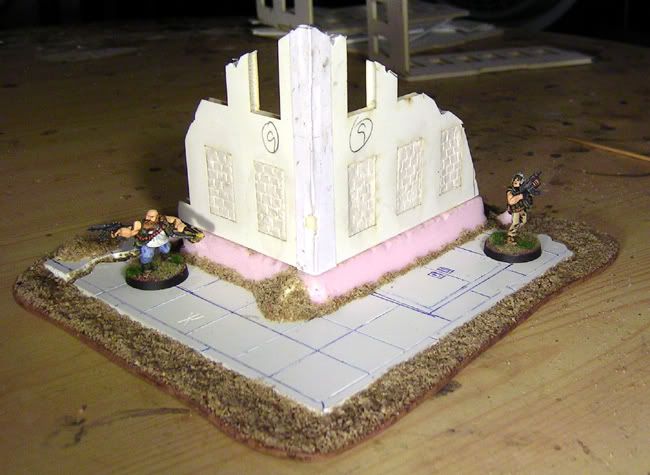
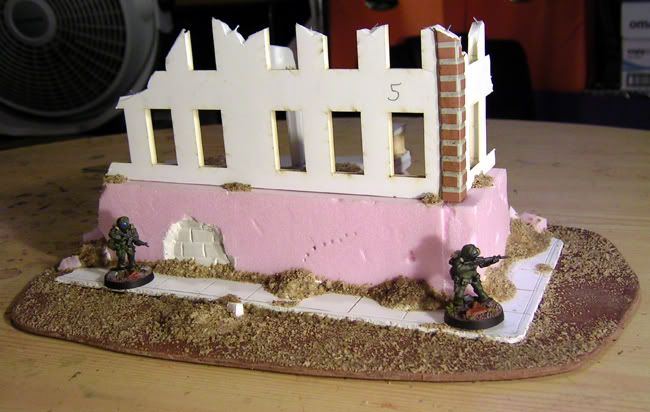
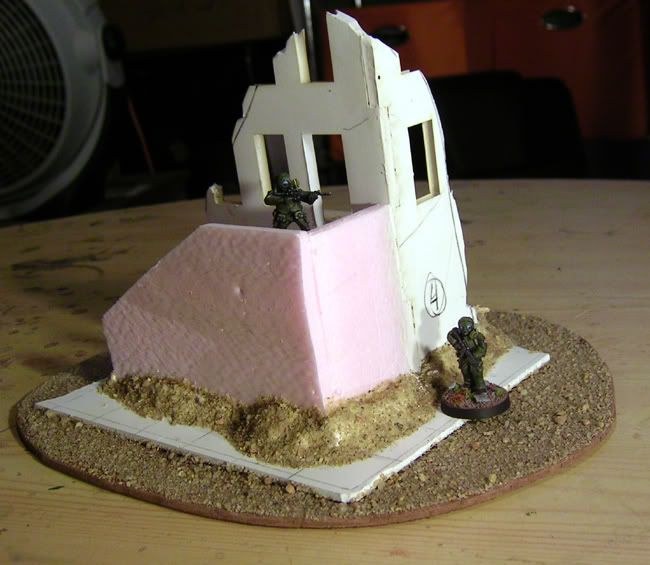
These four stand alone walls and one corner piece  are mounted on CDs  I used pink foam on  a couple of them, in order to give the ground level wall more height.  Detailing is done with various strips of cereal box, straws, hunks of foam-core and pink foam, and bits of wire. 

The miniatures in the photos give a good sense of how tall the levels in the Gamecraft building are.


Thursday, February 2, 2012

TEOTWAWKI - Blasted Ruins WIP, Pt 4

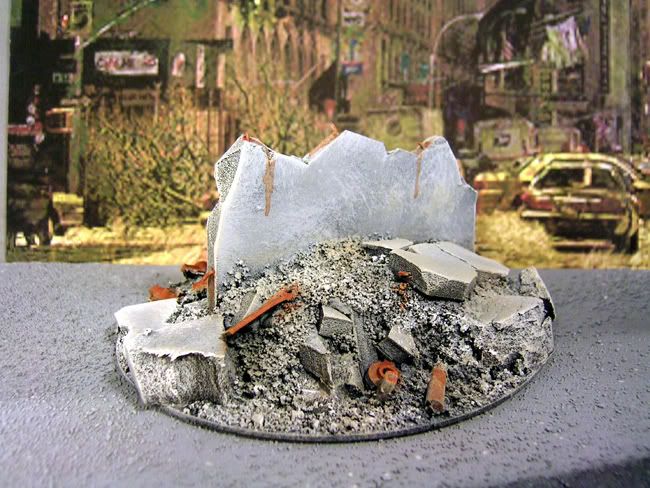
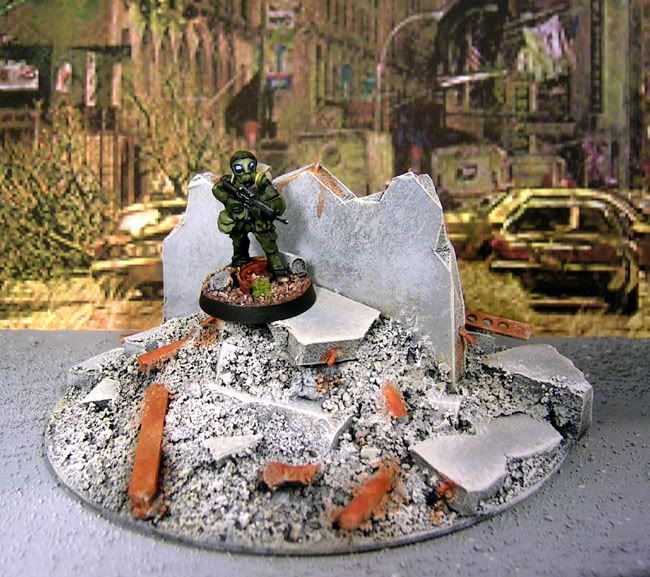
I made up a couple of test pieces, to see if what I had in mind was easy to do and feasible.  The first idea was to make some rubble piles to intersperse amongst the ruined buildings.  I threw one together using a CD, DAS Modeling Clay, Foamboard, Pink foam, Sand and other bits and pieces.   I like the way it turned out, and it was definitely easy to make and paint.  Now, I just need to make about 5-8 more of these:

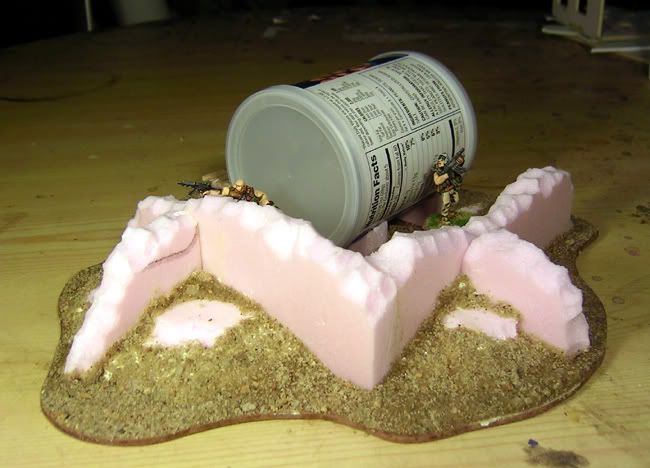
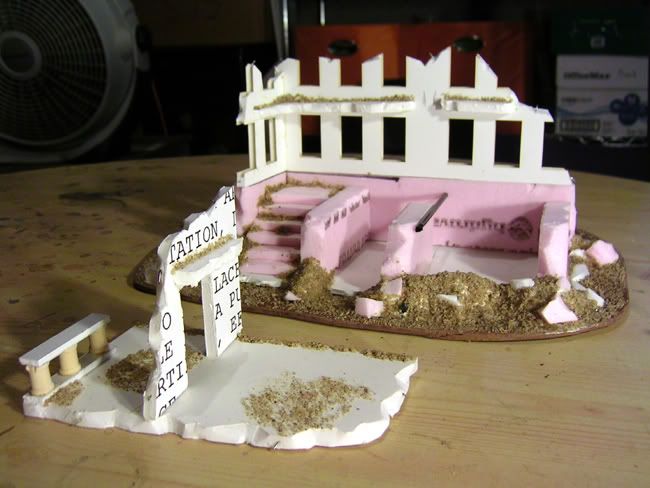
Next, I wanted to create some sort of trench like system, so I made some walls and storage tank.  I filled the voids with debris, and viola, a sunken area to move through; like a trench.


Playing around with this piece, I think I am going to make some small stand alone pieces to put around this to make it look like a complete ruined building, vs just the tank interior walls.

Thursday, January 12, 2012

TEOTWAWKI - Blasted Ruins WIP, Pt 3

Four more pieces ready for the paint booth.  Three are based on the Gamecraft foamboard pieces I've been  working with the past several posts.
I used DAS modeling clay to make the bricked up windows on this piece.
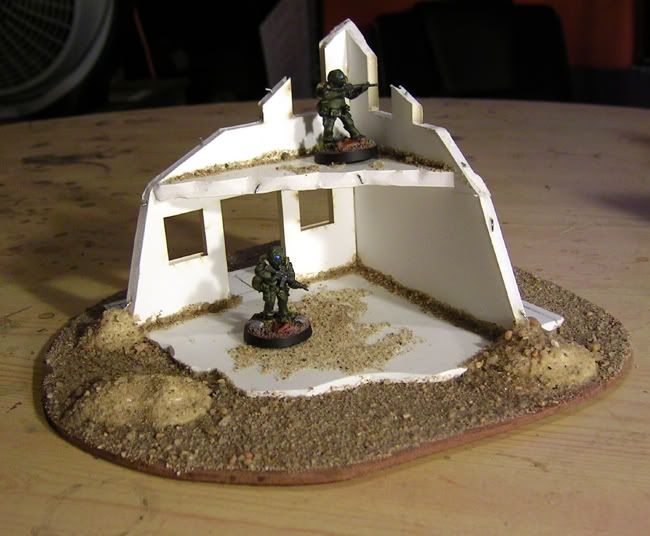
A plain corner piece
Large ruin using letters cut from a cereal box to give them relief.

Friday, December 23, 2011

TEOTWAWKI - Blasted Ruins WIP, Pt 2

Prepped some more ruins for painting. These are actually the second batch I' readied for painting.  The others, which have previously been post on the Post Apoc Wargames Forum will be posted here on ZSS sometime in January.


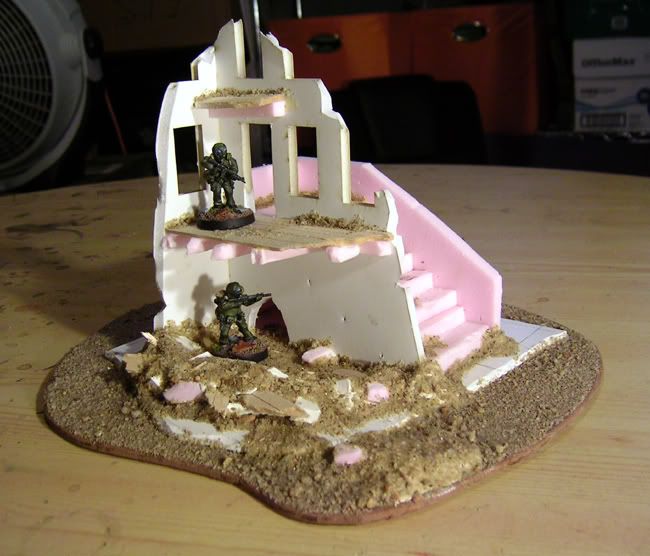
The upper floor of this piece comes off, so that figures can be placed in the basement.  It's cramped so no large figures won't fit; making it a good defensive position, when hiding from big nasties.

Saturday, December 17, 2011

TEOTWAWKI - Blasted Ruins WIP

I pulled this post from a PA gaming forum that I haunt, in an attempt to bring all my efforts under one roof.

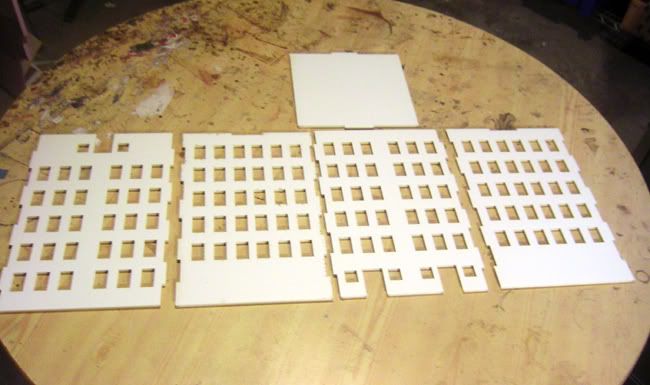
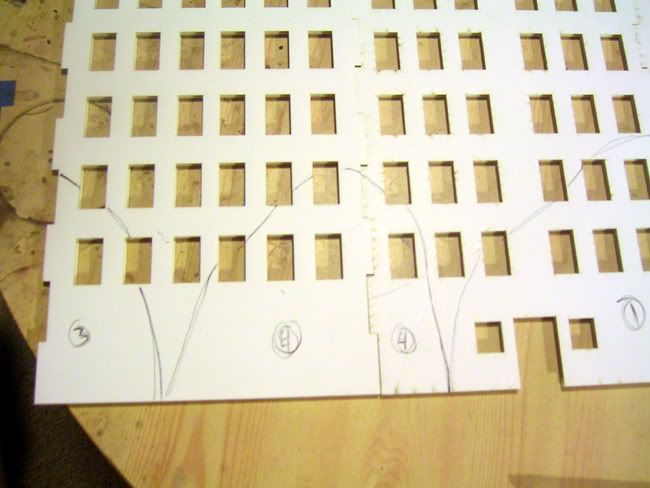
The first step in building the world of TEOTWAWKI is to make some blasted ruins. I started with a laser cut foam core 6 story building from Gamecraft.  With shipping it cost me $20.  It might seem a little steep in price, unless you've ever build ruins from foam core.  For me the money spent was worth it.  I'll most likely post a review of this item in the near future.  Here is is laid out on the table.


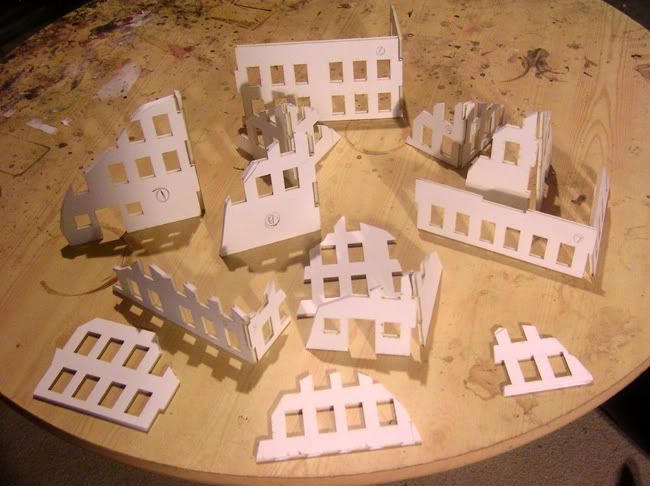
I then took and drew out my ruins and started cutting.  I numbered the pieces, so they didn't get mixed up in the pile.  In the end, I had very little in the way of unusable scrap material.


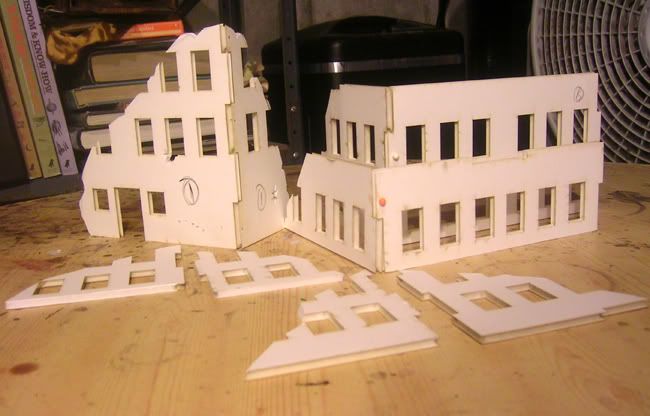
After I had the basic shapes cut out, I shaped them to look more like broken concrete and such.  I ended up with 13 pieces total; 9 corners and 4 standing walls:

Here's a close up of some of the corner pieces in various stages:

Thursday, December 15, 2011

TEOTWAWKI - My PA Project Gets A Hard Reboot.

I made the "mistake" of ordering some Post-Apoc figures from a company called Lead Adventure Miniatures.  I say it was a mistake, because when they arrived, and I was gob-smacked by how good they are.  They are so good that I decided to reboot my PA project, and build a new one around LAM's "The Last Project" minis.


The back ground will be reworked, giving it a much grittier, hard bitten flavor. The world will be much more devastated than what I envisioned in its predecessor.  Life will be harder and a lot cheaper.

The up side of all this is that there will be a lot less I will need to build.  All I need now is:

  1. 4' x 6' mat of some sort
  2. Enough ruined buildings to cover said 4' x 6' mat
  3. Bits and bobs to fill empty space between ruins
  4. 4 to 5 factions, with the possibility of more.
  5. 4 to 8 vehicles
The good news is that some of the stuff I have already will work in the new setting; the Salvage Crew and some ruins I am building.  Also, good news for other PA enthusiasts is that I will be selling some of the finished minis I had collected for the now defunct original project.

I hope to have something gameble  by fall of 2012, so I can run a game at Fall Recurits in Lee's Summit, MO.

Stay tuned, between now an the end of the year, I will be posting items I have finished, and am going to keep for this new incarnation.  I'll be bringing together some old posts from other sources.  Come Jan. 1, 2012, it will be all new content.

Sunday, December 4, 2011

On the Workbench - 12/01/11

4Here's this month's "On the Workbench" post.  Despite my best efforts, I ended up adding more stuff to the pile of unpainted minis.  My finished items and new items offset each other, a bit.  Still, not a bad month's output for November.


The new items and projects that I added stuff to are denoted by an * next to them.

On the Workbench for December 2011:
(This is all stuff that is partially finished; in no particular order)

15 28mm PA Survivors* - 3, 5 man packs from Lead Adventure Miniatures
20 Clicky Zombies* - Beefing up the amount of clicky Zeds I have.
20 Mantic Ghouls* - Mantic Ghoul Regiment 
20 28mm Zombies - Wargames Factory Plastic Zombies
6 28mm Survivors - Obelisck Nighthawk gang 
6 28mm Vampires - Pontoonier Wierd West vampires for Two Hour Wargames.  Unfinished commission work that needs to be done ASAP, as I've really let Ed down on this.  I have a feeling that I am just going to finish the project gratis
12 28mm Survivors - Atcheson Designs ATZ figs.  I will be doing an in depth review and size comparison on them 
28mm Post Apoc Ruins Project - Ruins made from Gamecraft's Foamcore 6 story building.  This one is half done.
10mm Ruins Project - Foamcore ruins for a BTech style game using Mechwarrior figs; another half finished project.
28mm River Barge - Post Apoc watercraft
28mm Vehicles* - 6-8 vehicles for my survivor; added another vehicle in November
15mm Suburbia - Paper/foamcore houses for suburban Lazarus. 
50 20mm WWII Russians - Minis for a semi defunct NUTS! East Front project I planned
2 T-34/85s - Same As Above
Various Fantasy/Sci Fi minis* - I have a box of old minis I use to try out techniques and hone my skills.  I have quite a few half painted figs that I'd like to finish


November's Finished Projects/Minis 
 (I will be posting these up through out the monthr, as I get photos and such)

15mm Armor - USMC LAV-25 and a US Army M2 Bradley
30 28mm Zombies - Mantic Zombie Regiment Box (Look for this post over at Welcome To Lazarus in the future)
2 "Clicky" Zombies - (Look for this post over at Welcome To Lazarus in the future) 
1 Foundry Street Violence Figure (Look for this post over at Welcome To Lazarus in the future)
6 man 28mm Post Apoc gang - Junior's Salvage Crew
10 15mm Survivors -You can see the first half of the "Here"
15mm Suburban House Test - Test house for modeling a suburan area for Lazarus
1 "Clicky" Scarecrow Conversion - Not sure where this one will show up, yet.

Friday, November 18, 2011

Blood n Gutz - My Post Apocalyptic Project

My big project at the moment; the one I am determined to complete to a playable state, before all else, is a Post Apoc setting, n 28mm.  Based in the remnants of California, the world of "Blood N Gutz" will pit various groups of survivors against one another is a world devastated by a limited nuclear war.

I've been working on this for a while and have various bits partially completed.  I've been posting finished bits, fluff and ideas on the Post Apoc Wargames Forum.  I am going to try to bring them all together here and make the the primary site for updates and such.

My To-Do list for the project is as follows:


Survivors - There will be 8-10 factions having between 6 and 30 figs each
Vehicles - Various vehicles for the factions
Terrain - I will have 3 main settings; Blasted City, Desolate Settlement/Wilderness, and  Abandoned Suburbs
Background and Fluff -just a bit to give the world a bit of flavor

Tuesday, November 1, 2011

Where To Start?

Where do I start?  Do I back fill with some golden oldies from my collection; in order to generate posts?  Do I start from scratch; and come up with an original new project for the kick off of this blog?   I think neither.  First thing I'll do is take an accounting of what all I have on the work bench at the moment and share the results.  This "On The Work Bench" is going to be a regular feature here and over at "Welcome To Lazarus"; my a fore mentioned Zombie gaming blog.  It, along with some of the content will get cross posted.  Hey, 2 for the price of one on the amount of work I have to do!  How great is that?

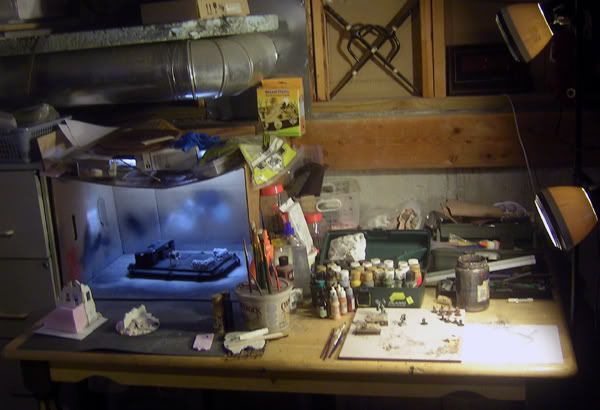
The workbench in the Hobby Cave.  It's actually much better lit than the pic suggests.
If anything, this running dialog will keep me on track and help me prioritize what I need to get done.  Your input is more than welcome, and you never know.  Maybe if there is enough hue and cry, an item will get bumped to the top of the list, just to placate the masses.

On the Workbench for November 2011:
(This is all stuff that is partially finished; in no particular order)
15mm Armor - USMC LAV-25 and a US Army M2 Bradley
30 28mm Zombies - Mantic Zombie Regiment Box
20 28mm Zombies - Wargames Factory Plastic Zombies
6 28mm Survivors - Obelisck Nighthawk gang
2 "Clicky" Zombies - Ongoing conversions
6 28mm Vampires - Pontoonier Wierd West vampires for Two Hour Wargames.  Unfinished commission work that needs to be done ASAP, as I've really let Ed down on this.  I have a feeling that I am just going to finish the project gratis
12 28mm Survivors - Atcheson Designs ATZ figs.  I will be doing an in depth review and size comparison on them
28mm Post Apoc gang - More survivors to battle in the rubble.
28mm Post Apoc Ruins Project - Ruins made from Gamecraft's Foamcore 6 story building.  This one is half done.
10mm Ruins Project - Foamcore ruins for a BTech style game using Mechwarrior figs; another half finished project.
28mm River Barge - Post Apoc watercraft
28mm Vehicles - 6-8 vehicles for my survivors
15mm Suburbia - Paper/foamcore houses for suburban Lazarus.
10 15mm Survivors - Figs from a company called "The Scene".  I have 5 Survivors and 5 Government types in the works.
50 20mm WWII Russians - Minis for a semi defunct NUTS! East Front project I planned
2 T-34/85s - Same As Above
Various Fantasy/Sci Fi minis - I have a box of old minis I use to try out techniques and hone my skills.  I have quite a few half painted figs that I'd like to finish

October's Finished Projects/Minis 
 (I will be posting these up through out November, as I get photos and such)

6 28mm Survivors - Look for them next Friday!
2 28mm Aztec Vampire Maidens - Part of my sidetracked Weird West commission for THW
1 Steam-powered Armored Suit - "Clicky" rebase and paint for Post Apoc gaming
90 15mm Rebel Minis (Zeds and Survivors) - Commission job for Scale Creep; looking forward to seeing what Mark does with them.  It'll be a hoot.
5 28mm Ruins - Part of my Post Apoc Ruins project