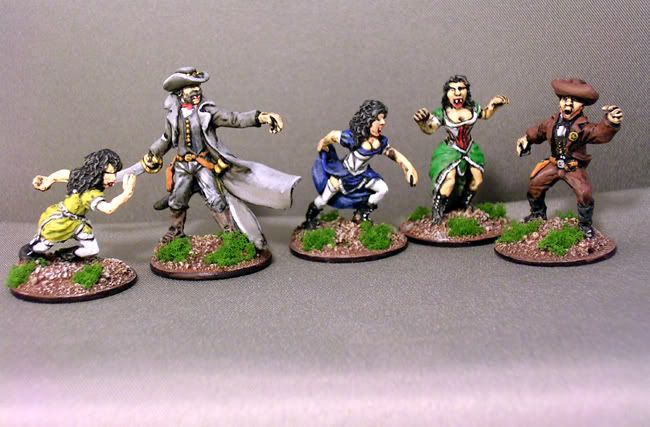
"The South will rise again" takes on a whole new meaning, as a Confederate vampire sics his minions on a local law man.
These figs are the last of the Pontoonier minis I did for Two Hour Wargames. I started and stripped these things three times, for some reason I simply could not get them painted. They sat on my shelf looking at me accusingly for several months. I finally was able to get them looking good, and not a moment too soon. I have really grown to despise these things :-)
Monday, April 9, 2012
Saturday, April 7, 2012
2012 Fifty Cent Miniature Challenge, Pt 3
Time for an update on this year's challenge. I picked up a couple HUMMVs at Spring Recruits. I paid $2 each for them. They became the next items in line for the challenge. I sold them for $8, basically doubling my money. A nice profit.
Ok, I bough another item for $5 and turned around an put it up for sale. Technically, I bought the item from my self. I say this, because I bought it with the full intent of adding it to the challenge, even though I didn't have the $$$ in the challenge pile o cash. I bought it on credit; essentially.
The item was 42 Gnoblars, from GWs Ogre Kingdoms.
I put them up for sale at the same time as the Hummers. They didn't sell, though. So, I decided to go ahead and paint at least some of them. When they go out the door, I'll post another update. So as of today here's where the challenge sits:
Days Remaining: 245
Balance: $3.57
Ok, I bough another item for $5 and turned around an put it up for sale. Technically, I bought the item from my self. I say this, because I bought it with the full intent of adding it to the challenge, even though I didn't have the $$$ in the challenge pile o cash. I bought it on credit; essentially.
The item was 42 Gnoblars, from GWs Ogre Kingdoms.
![]() |
| Ignore the crappy pic; I'll post a better one, once figs are painted. |
Days Remaining: 245
Balance: $3.57
Thursday, April 5, 2012
On The Workbench - 4/12
"On The Workbench" is a little late this month, because Spring Recruits a local convention in Lee's Summit, MO, was this weekend. I bagged a boatload of stuff I've been reselling. I've spent the last several days handling that, and haven't had precious little time to do much of anything else. With a bit of luck, I'll have photos posted and a rundown of how the convention was in a few days. Things have settled down, though that I can post this month's "On the Workbench".
The new items and projects that I added stuff to are denoted by an * next to them.
On the Workbench for April 2012:
(This is all stuff that is partially finished; in no particular order)
10mm Ruins Project* - I got a pile of old Epic plastic ruins, which are replacing the foam core ruins I was going to build and use for my Mech Warrior project.
4 20mm Ruins* - Plastic 20mm ruins I am building for resale.
12 Acheson ATZ Minis - More minis for paint and review.
6'x4' Zuzzy Mat - Gaming Mat for my TEOTWAWKI project.
15 28mm PA Survivors - 3, 5 man packs from Lead Adventure Miniatures
18 Heroclix Figs - Figures for conversion into sci-fi and horror gaming minis
6 Pulp/Steampunk Minis - 6 figures left on the commission painting of some Fiendish Fabrications figures
20 Mantic Ghouls - Mantic Ghoul Regiment
6 28mm Survivors - Obelisck Nighthawk gang
28mm Post Apoc Ruins Project - Ruins made from Gamecraft's Foamcore 6 story building. This one is half done.
28mm Vehicles - 6-8 vehicles for my survivors
15mm Suburbia - Paper/foamcore houses for suburban Lazarus.
50 20mm WWII Russians - Minis for a semi defunct NUTS! East Front project I planned
2 T-34/85s - Same As Above
Various Fantasy/Sci Fi minis - I have a box of old minis I use to try out techniques and hone my skills. I have quite a few half painted figs that I'd like to finish
March's Finished Projects/Minis
(I will be posting these up through out the month, as I get photos and such)
10 x Fiendish Fabrications Mudmen - 10 more finished for THW.
20 x 15mm Peter Pig Figs - 20 more militia for my Ambush Alley game.
7 x 28mm Dragon's Teeth Terrain - Painted the resin peices I cast last month.
20 x 15mm Rebel Mini Riot Police - To Crack the heads of the rioters I did last month.
1 x HeroClix Conversion - Photo Pending.
If you don't see the above posted here, now or in the future, you can check out Welcome To Lazarus for them.
On the Workbench for April 2012:
(This is all stuff that is partially finished; in no particular order)
10mm Ruins Project* - I got a pile of old Epic plastic ruins, which are replacing the foam core ruins I was going to build and use for my Mech Warrior project.
4 20mm Ruins* - Plastic 20mm ruins I am building for resale.
12 Acheson ATZ Minis - More minis for paint and review.
6'x4' Zuzzy Mat - Gaming Mat for my TEOTWAWKI project.
15 28mm PA Survivors - 3, 5 man packs from Lead Adventure Miniatures
18 Heroclix Figs - Figures for conversion into sci-fi and horror gaming minis
6 Pulp/Steampunk Minis - 6 figures left on the commission painting of some Fiendish Fabrications figures
20 Mantic Ghouls - Mantic Ghoul Regiment
6 28mm Survivors - Obelisck Nighthawk gang
28mm Post Apoc Ruins Project - Ruins made from Gamecraft's Foamcore 6 story building. This one is half done.
28mm Vehicles - 6-8 vehicles for my survivors
15mm Suburbia - Paper/foamcore houses for suburban Lazarus.
50 20mm WWII Russians - Minis for a semi defunct NUTS! East Front project I planned
2 T-34/85s - Same As Above
Various Fantasy/Sci Fi minis - I have a box of old minis I use to try out techniques and hone my skills. I have quite a few half painted figs that I'd like to finish
March's Finished Projects/Minis
(I will be posting these up through out the month, as I get photos and such)
10 x Fiendish Fabrications Mudmen - 10 more finished for THW.
20 x 15mm Peter Pig Figs - 20 more militia for my Ambush Alley game.
7 x 28mm Dragon's Teeth Terrain - Painted the resin peices I cast last month.
20 x 15mm Rebel Mini Riot Police - To Crack the heads of the rioters I did last month.
1 x HeroClix Conversion - Photo Pending.
If you don't see the above posted here, now or in the future, you can check out Welcome To Lazarus for them.
Tuesday, April 3, 2012
Making a Flying Base
I promised to make a tutorial on how to throw together a flying base over on Welcome To Lazarus, which I posted today. I've reposted it here, in case you don't follow my other blog. It's a simple process which can turn out nice looking and very functional accessories for your table
Materials:
You'll need the following:
Fender washer or CD; depending on the scale of your aircraft. The process is the same, despite the scale.
Wire Hanger, or Bendable Metal Rod
Glue; Both SuperGlu or HotGlue will work
Modeling Clay
Sand
Rocks; optional
Earthtone Paints
Drill with a bit as big as your wire
Side-Snip Wire Cutters
Step 1:
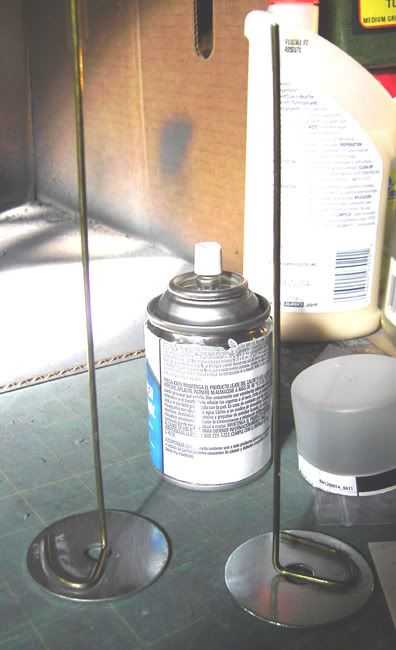
The first thing you do is cut the wire hanger to the length you want. For 15mm, I use about 10-12 inches. Make a hook in one end of the wire, then make a 90 degree bend in it. See the photo below to get an idea of what it should look like.
Step 2:
Use your glue to attach the wire to fender washer or CD. The larger the loop you made, the more contact area you have with the base. It's a good idea to try to make give the wire as much contact area as possible.
Step 3:
Take your drill and drill a hole in the bottom of your aircraft. It's a good idea to try and make it close to the center of gravity as possible, as this saves you some hassle making sure the model is stable when on the base, later on. Test fit the aircraft to the wire. At this point, I've seen people go all out, making sleeves that the wire fits into, or adding magnets. That's great, if you want to do the extra work. At smaller scales, though, it just doesn't seem worth it.
Step 4:
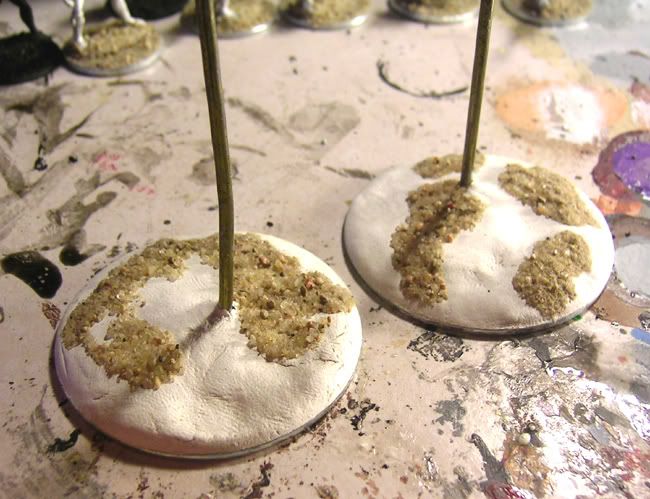
Once the glue has dried, take your modeling clay and build up the base. You can add any details you want. I use small rocks and sand. I've seen people use a lot of other things, as well. I even saw one base that had a house on it, with the wire running up through a smoking chimney! If you need a bit of extra weight, to stabilize the base when the aircraft is attached, this is when you do it. Use the optional rocks to give the base the needed heft.
Step 5:
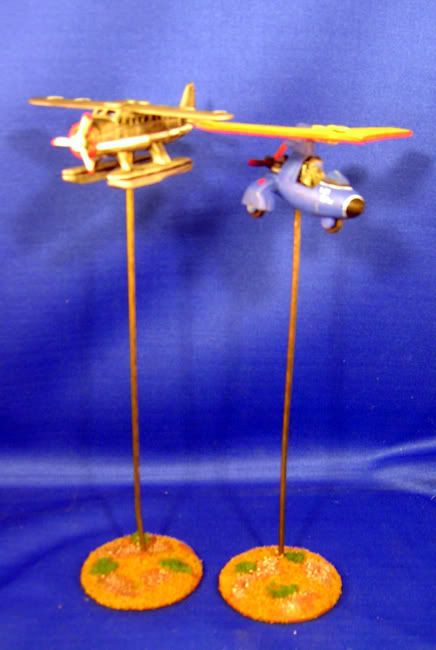
The last step is to paint the base. I use the same technique I use on my mini bases, only on a larger scale. In a nutshell, I prime the, black (masking the wire in the process), then use my earth tones to give it color and pick out details. Finally, I add flock and static grass. I've seen people add trees and bushes, too.
To use the bases, simply slide the aircraft on and off the wire when needed. Pretty simple and quick to do.
Materials:
You'll need the following:
Fender washer or CD; depending on the scale of your aircraft. The process is the same, despite the scale.
Wire Hanger, or Bendable Metal Rod
Glue; Both SuperGlu or HotGlue will work
Modeling Clay
Sand
Rocks; optional
Earthtone Paints
Drill with a bit as big as your wire
Side-Snip Wire Cutters
Step 1:
The first thing you do is cut the wire hanger to the length you want. For 15mm, I use about 10-12 inches. Make a hook in one end of the wire, then make a 90 degree bend in it. See the photo below to get an idea of what it should look like.
The Results of Steps 1 and 2
Step 2:
Use your glue to attach the wire to fender washer or CD. The larger the loop you made, the more contact area you have with the base. It's a good idea to try to make give the wire as much contact area as possible.
Step 3:
Take your drill and drill a hole in the bottom of your aircraft. It's a good idea to try and make it close to the center of gravity as possible, as this saves you some hassle making sure the model is stable when on the base, later on. Test fit the aircraft to the wire. At this point, I've seen people go all out, making sleeves that the wire fits into, or adding magnets. That's great, if you want to do the extra work. At smaller scales, though, it just doesn't seem worth it.
Step 4:
Once the glue has dried, take your modeling clay and build up the base. You can add any details you want. I use small rocks and sand. I've seen people use a lot of other things, as well. I even saw one base that had a house on it, with the wire running up through a smoking chimney! If you need a bit of extra weight, to stabilize the base when the aircraft is attached, this is when you do it. Use the optional rocks to give the base the needed heft.
Step 4 Complete
Step 5:
The last step is to paint the base. I use the same technique I use on my mini bases, only on a larger scale. In a nutshell, I prime the, black (masking the wire in the process), then use my earth tones to give it color and pick out details. Finally, I add flock and static grass. I've seen people add trees and bushes, too.
The Finished Product
To use the bases, simply slide the aircraft on and off the wire when needed. Pretty simple and quick to do.
Monday, March 26, 2012
Mega Minis Woodland Creatures
Ed, from THW sent me some minis to paint up for him...as he is wont to do at times. This time around some of the figs in the batch he wanted painted were some Woodland Creatures from Mega Minis. There were a Beaver, a Mountain Lion, a Badger, a Stag, and a Bear.
These figs are your typical mega Mini figs. They area great compromise between quality and price. There are gems through out the mega Minis lines. In this one, it is the Stag, IMO. That is a nice figure as far as I am concerned.
Friday, March 23, 2012
2012 Fifty Cent Miniature Challenge, Pt 2
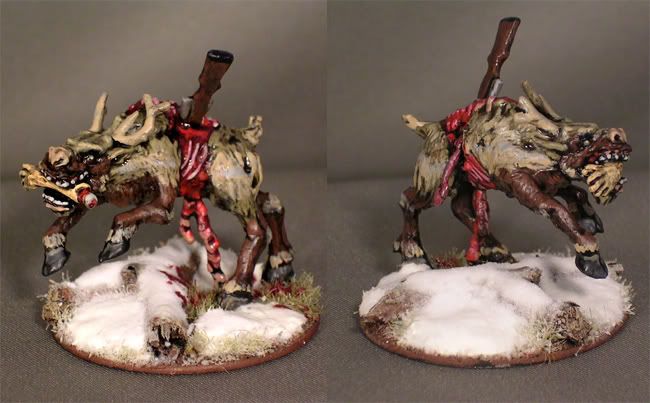
I forgot to post this earlier, I finally sold the first item in my 2012 FCM Challenge. If you remember, it was the Zombie Reindeer.
It sold as part of a larger group of minis and ended up going for $5.07, once paypal fees, shipping, and price per fig are averaged. Once, the original purchase price is figured in the profit off the sale is $4.57.
Off to a slow start. There is a local convention that is coming up, and I am eyeing some cheap toys to do some conversion on. Hopefully, within the next couple of weeks I'll be able to do some wheeling and dealing to increase the amount in the profit column.
Days Remaining: 283
Balance: $4.57
It sold as part of a larger group of minis and ended up going for $5.07, once paypal fees, shipping, and price per fig are averaged. Once, the original purchase price is figured in the profit off the sale is $4.57.
Off to a slow start. There is a local convention that is coming up, and I am eyeing some cheap toys to do some conversion on. Hopefully, within the next couple of weeks I'll be able to do some wheeling and dealing to increase the amount in the profit column.
Days Remaining: 283
Balance: $4.57
Monday, March 19, 2012
And Now For Something Completly...Orky
I felt the need to do something different, so I dug up this old Gorka Morka Ork and painted it. I tried to up the quality of the paint job. Even though I am pleased with the end results, I am not 100% satisfied with them. The skin tone could have been better and the eyes are kind of "meh".
Even though I'd be considered a heretic by many GW fan-boys for various reasons, I still appreciate the quality of most of the GW minis. This post proves that I am not 100% adverse to putting paint to brush on a GW fig. Heck, I'd even field some on a table top; not using GW rules of course :-P
Subscribe to:
Posts (Atom)